| Changing Installing Shock Absorbers |
Installing
New Shock Absorbers | Step 2 | Step
3 | Step 4 | Step
5 | Step 6
Step 7 | Step
8 | Step 9 | Step
10
You're in the home stretch now ! Take
off the nut and washer temporarily used to hold the shock on at
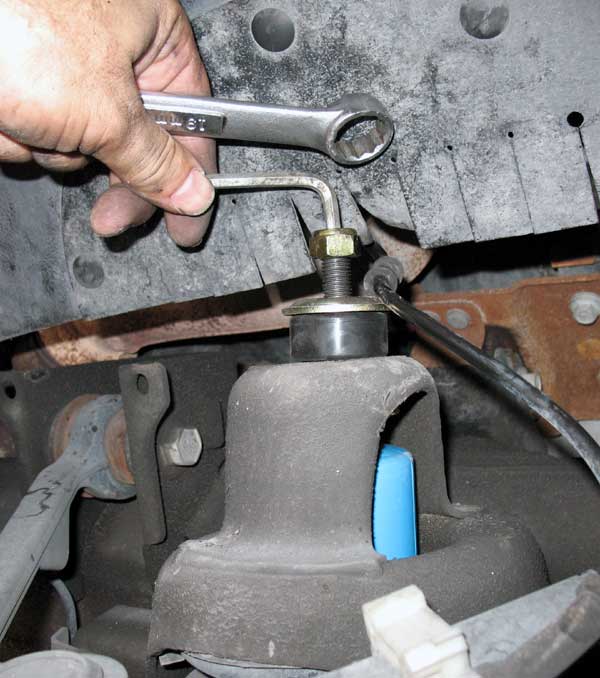
the top. Now re-install with the new upper washer, bushing, and
nut. Normally while tightening up the upper nut, you have to worry again about the piston rod rotating while you are trying to turn the nut. But in this case (thanks to some great German engineering), most Bilstein units have an Allen hex-opening manufactured into the threaded rod, so you can hold the rod still by inserting an Allen Wrench tool. Now you just need to tighten up the nut on the shock. In this instance, Bilstein recommends 35 - 46 foot/lbs of torque. Once the shock is tightened up, don't forget to reinstall that Ford plastic clip for the brake line. NEVER USE A POWER TOOL TO TIGHTEN UP THE TOP NUT ON A SHOCK ABSORBER! YOU CAN STRIP THE THREADS OFF ! ________ DOUBLE CHECK YOUR INSTALLATION ! Go back and make sure all the bolts and nuts are tight! Make sure there are no pinched brake lines, wires, etc. that may come in contact with moving suspension parts. You're Done ! Enjoy your new shocks ! ________ Note: Some people have emailed me about an alignment. In this case, with a shock installation, you are not altering any alignment specs on the suspension, so it's really not needed. In some areas (for instance, the county I live in), a repair shop has to do an alignment with any installation of shocks or struts, it is the law. But mechanically, it's not needed. (this does not apply to changing struts, which are an integral part of a suspension, and in those cases, you MUST have an alignment).
|
Installing New Shock Absorbers | Step 2 | Step 3 | Step 4 | Step 5 | Step 6 | Step 7 | Step 8 | Step 9 | Step 10